
No products in the cart.
Non-Backlit Pop-Up Display Case: Hook-and-Loop Graphics for Indoor Events
Quick answer: This pop-up display configuration was supplied without light strips because an illuminated effect was not required. The printed graphic attaches with hook-and-loop fastening, while an expandable lattice frame provides the supporting structure. The supplied event photographs show the bare frame, attachment details and finished graphic surfaces in indoor presentation settings.
Case overview: choosing the display around the setting
The requirement described for this configuration was straightforward: provide a large event graphic without internal illumination. Rather than specifying a lightbox effect, the build used the venue’s ambient lighting and a hook-and-loop graphic attachment.
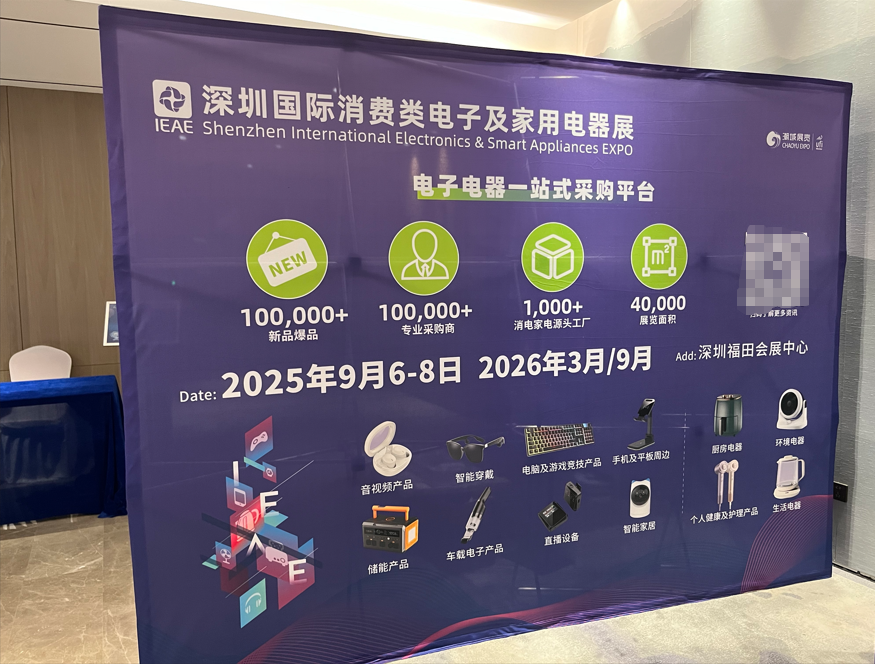
The photographs include an electronics-expo promotional graphic, a business-services presentation and cultural-event signage. Together, they illustrate how this display format can support different messages. They are not presented as one continuous customer project or proof of campaign performance.
| Case detail | Documented configuration |
|---|---|
| Display structure | Expandable lattice frame with perimeter strips |
| Illumination | Light strips omitted for this non-backlit application |
| Graphic attachment | Hook-and-loop fastening, as confirmed by the supplier |
| Setting shown | Indoor event and presentation spaces |
| Finished use | Large printed messaging, service information and event identity |
The expandable frame behind the graphic
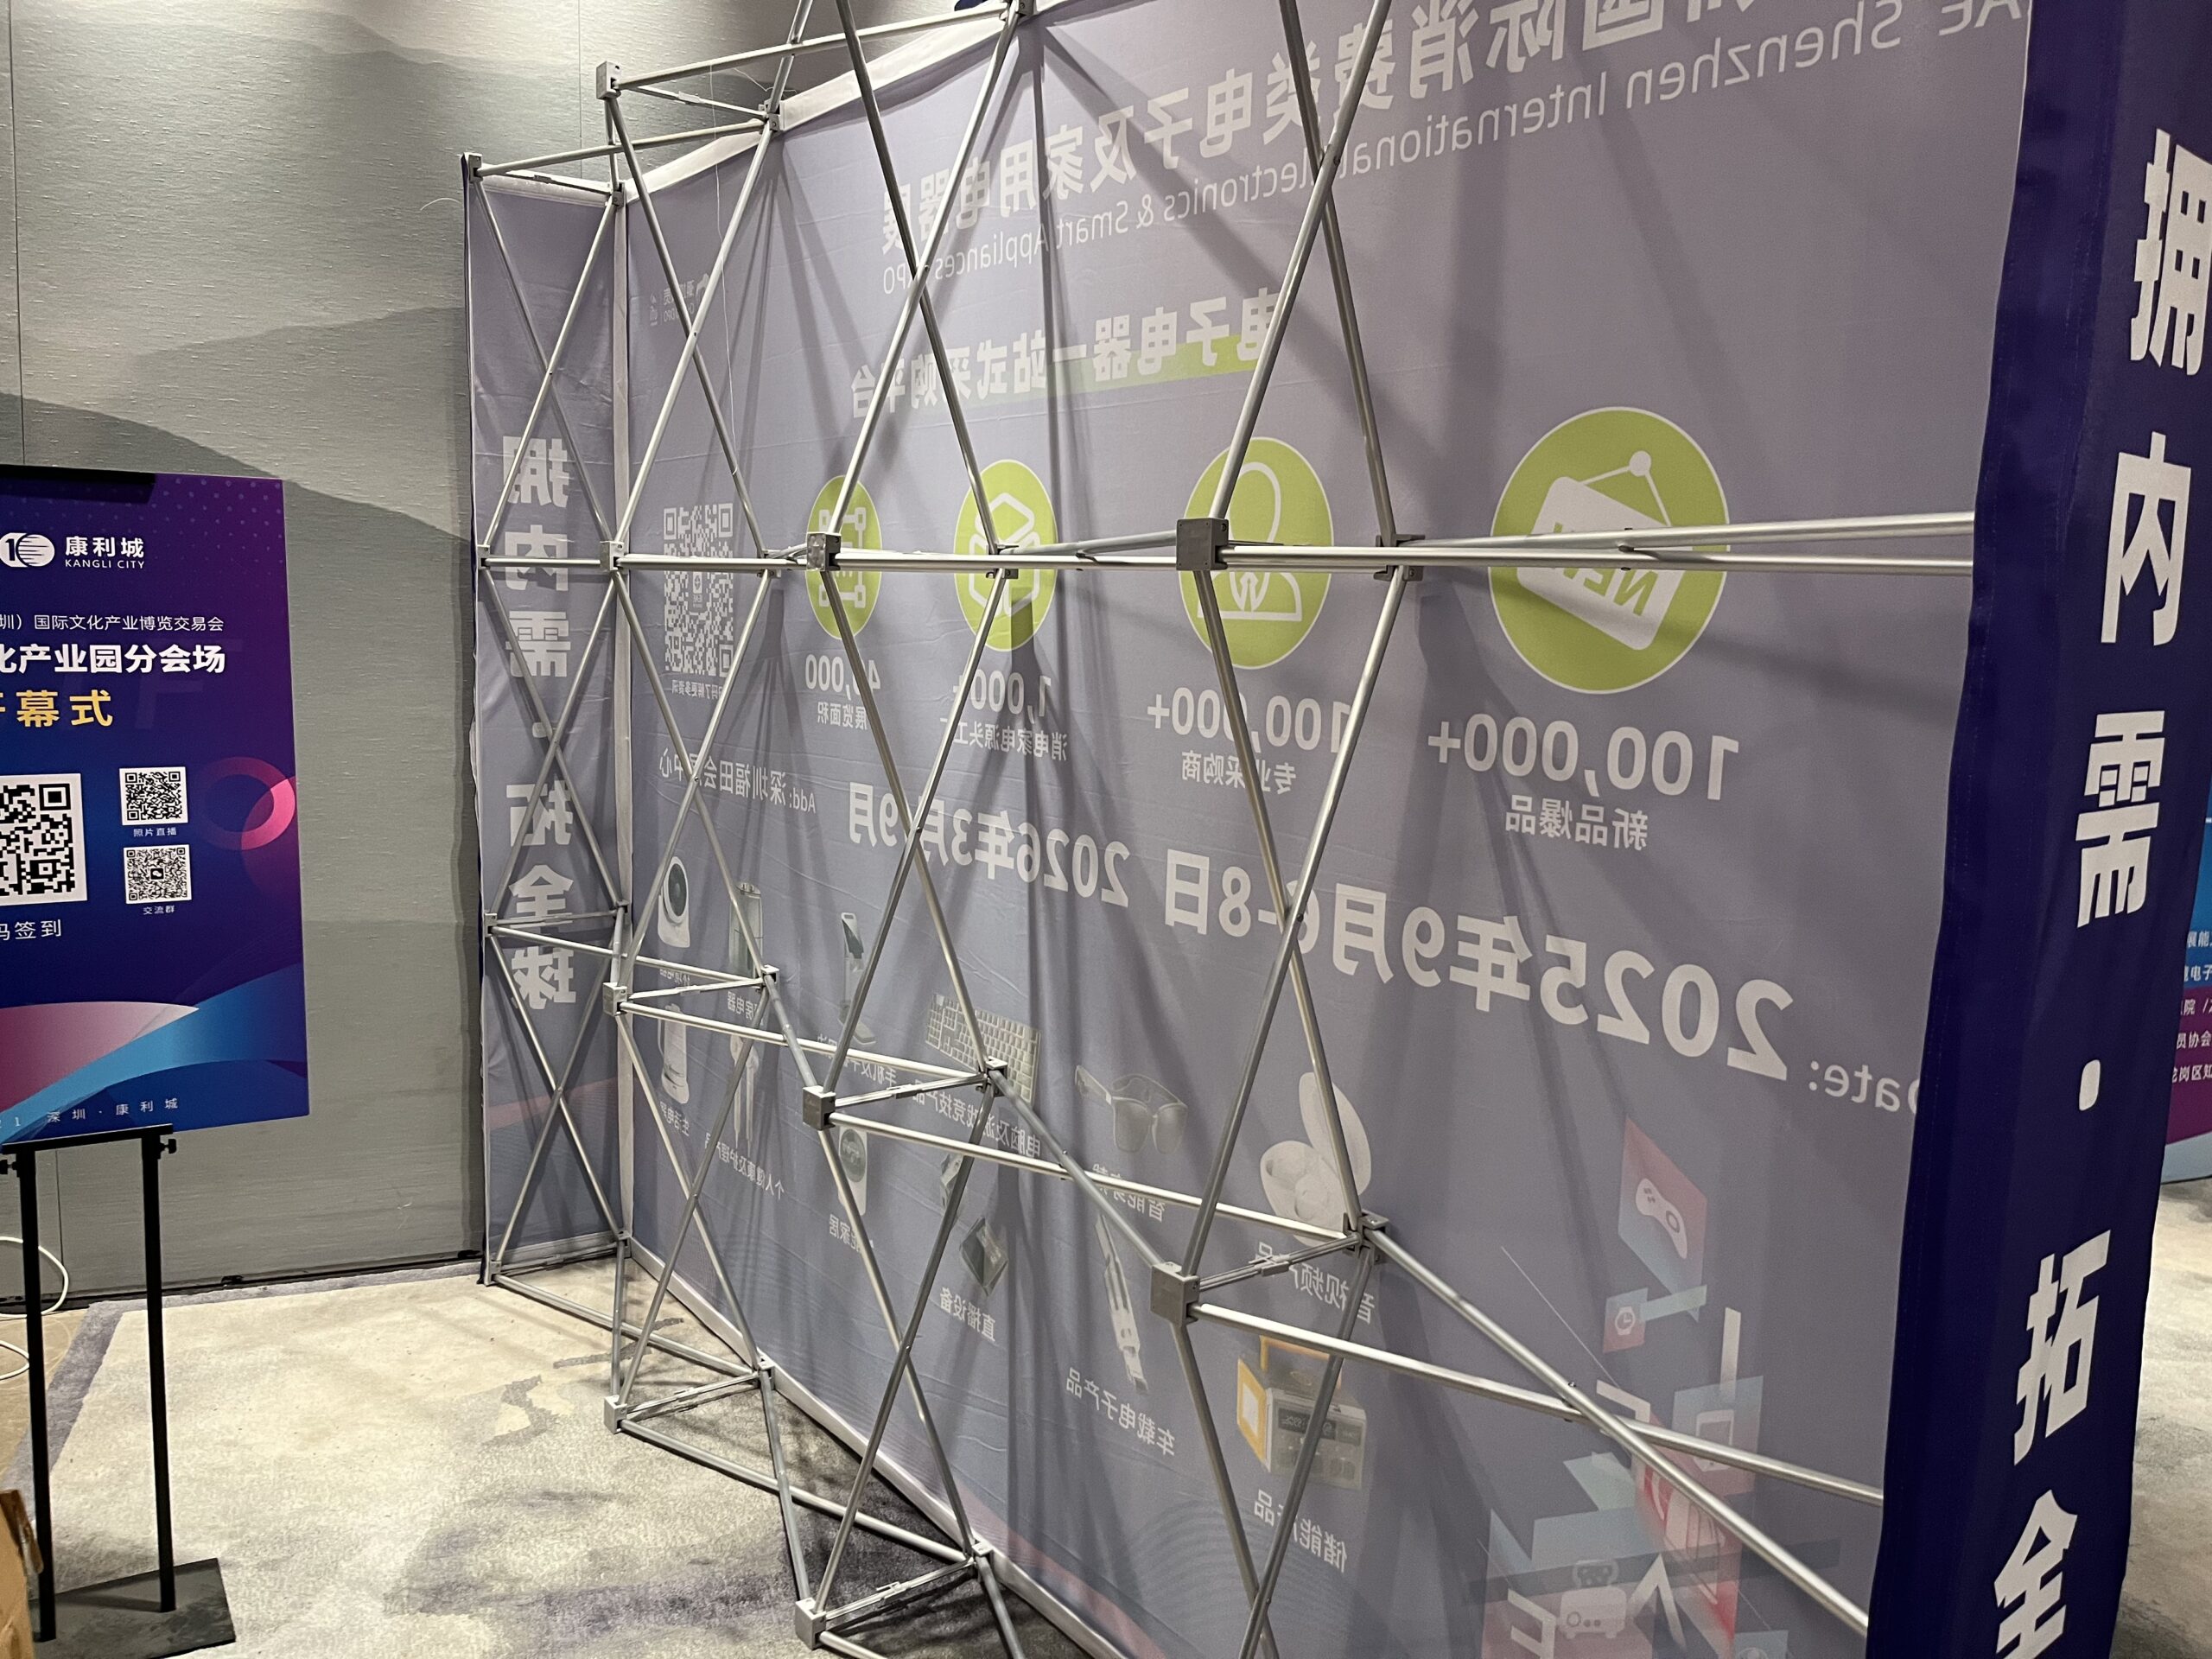
The uncovered frame photograph shows linked diagonal members and repeated connection points. The structure is expanded and laid horizontally, making the lattice and its perimeter easier to inspect than in a finished front view.
This is a different arrangement from a segmented tube-frame pillowcase backdrop. Here, the expanding frame creates the supporting grid and the graphic is secured to the intended attachment strips. Matching the graphic to that particular frame and fastening layout matters when specifying a replacement.
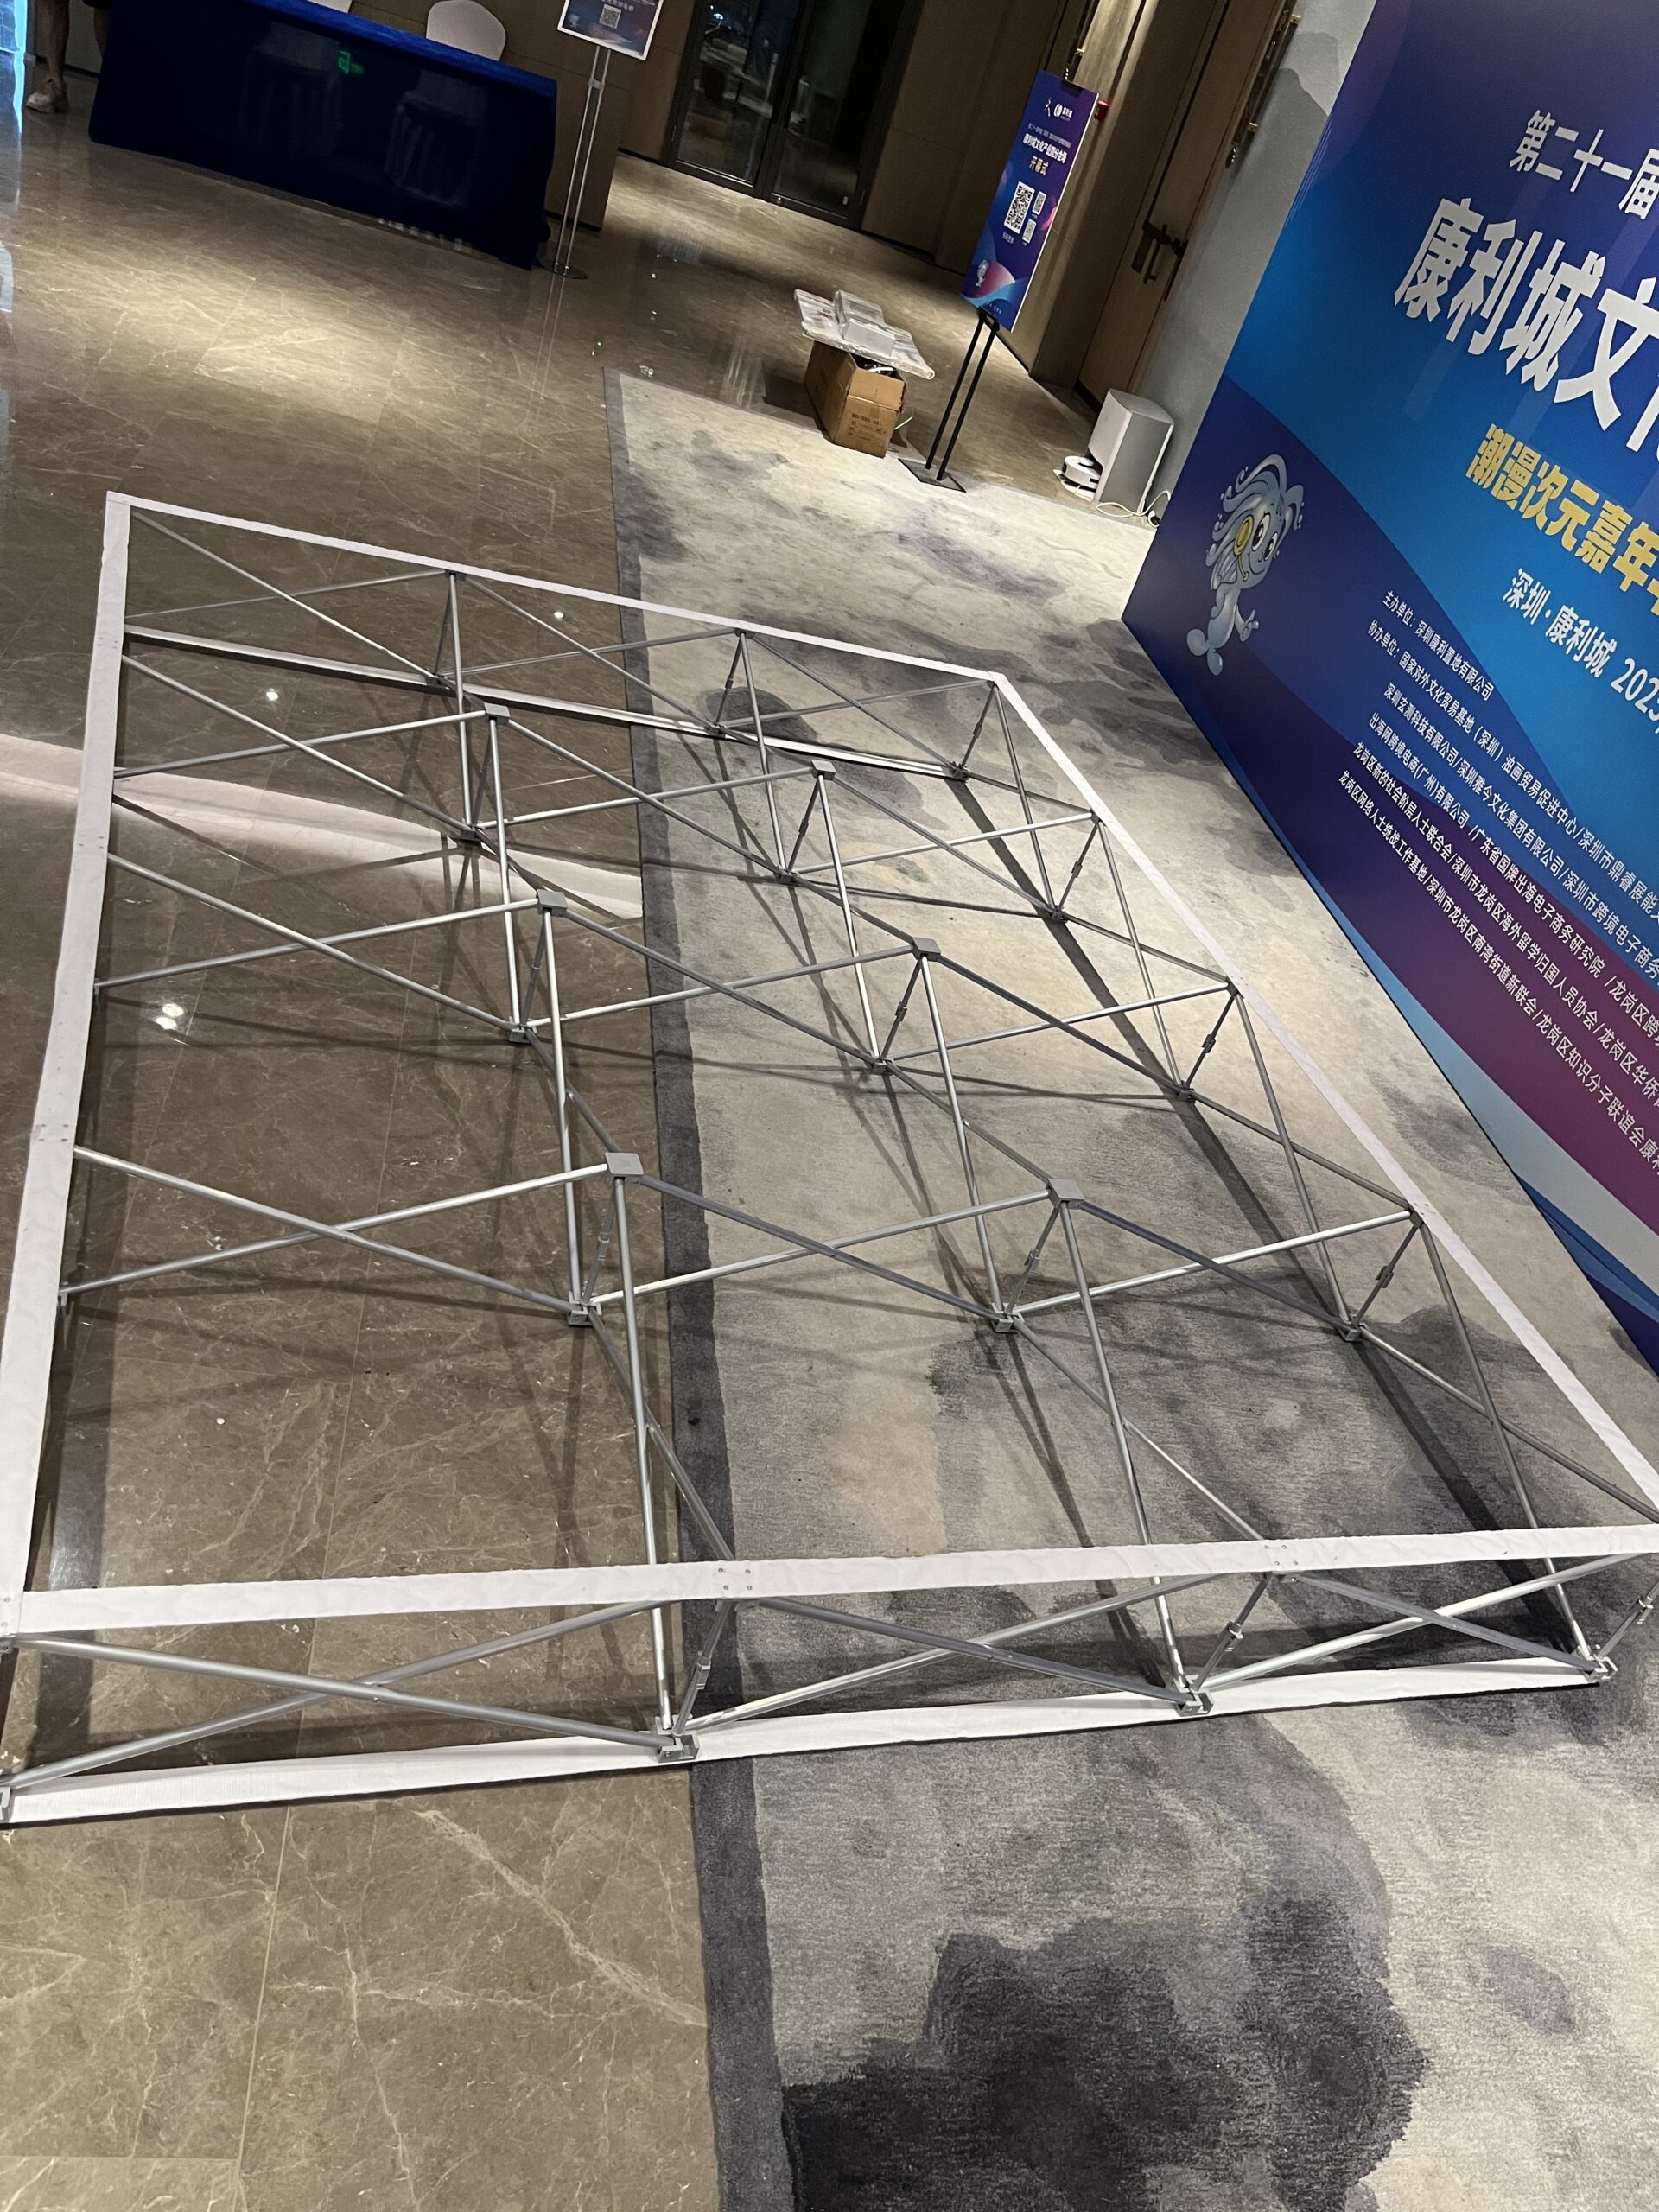
Before fitting the graphic, check that the frame is fully opened and secured using its prescribed connections. Inspect the perimeter, joints and support arrangement. Work on a clean protected surface so the print does not rub against the floor during handling.
Hook-and-loop fastening at the graphic edge
The close-up photograph shows a broad white fastening strip beside the printed graphic and metal frame members. The supplier identifies this as the hook-and-loop attachment used for the configuration.
The practical purpose is to hold the matching graphic against the intended frame edges while allowing it to be released for dismantling. Confirm which surfaces carry the hook and loop, where each strip should meet, and how the graphic aligns with the frame before pressing it into place.
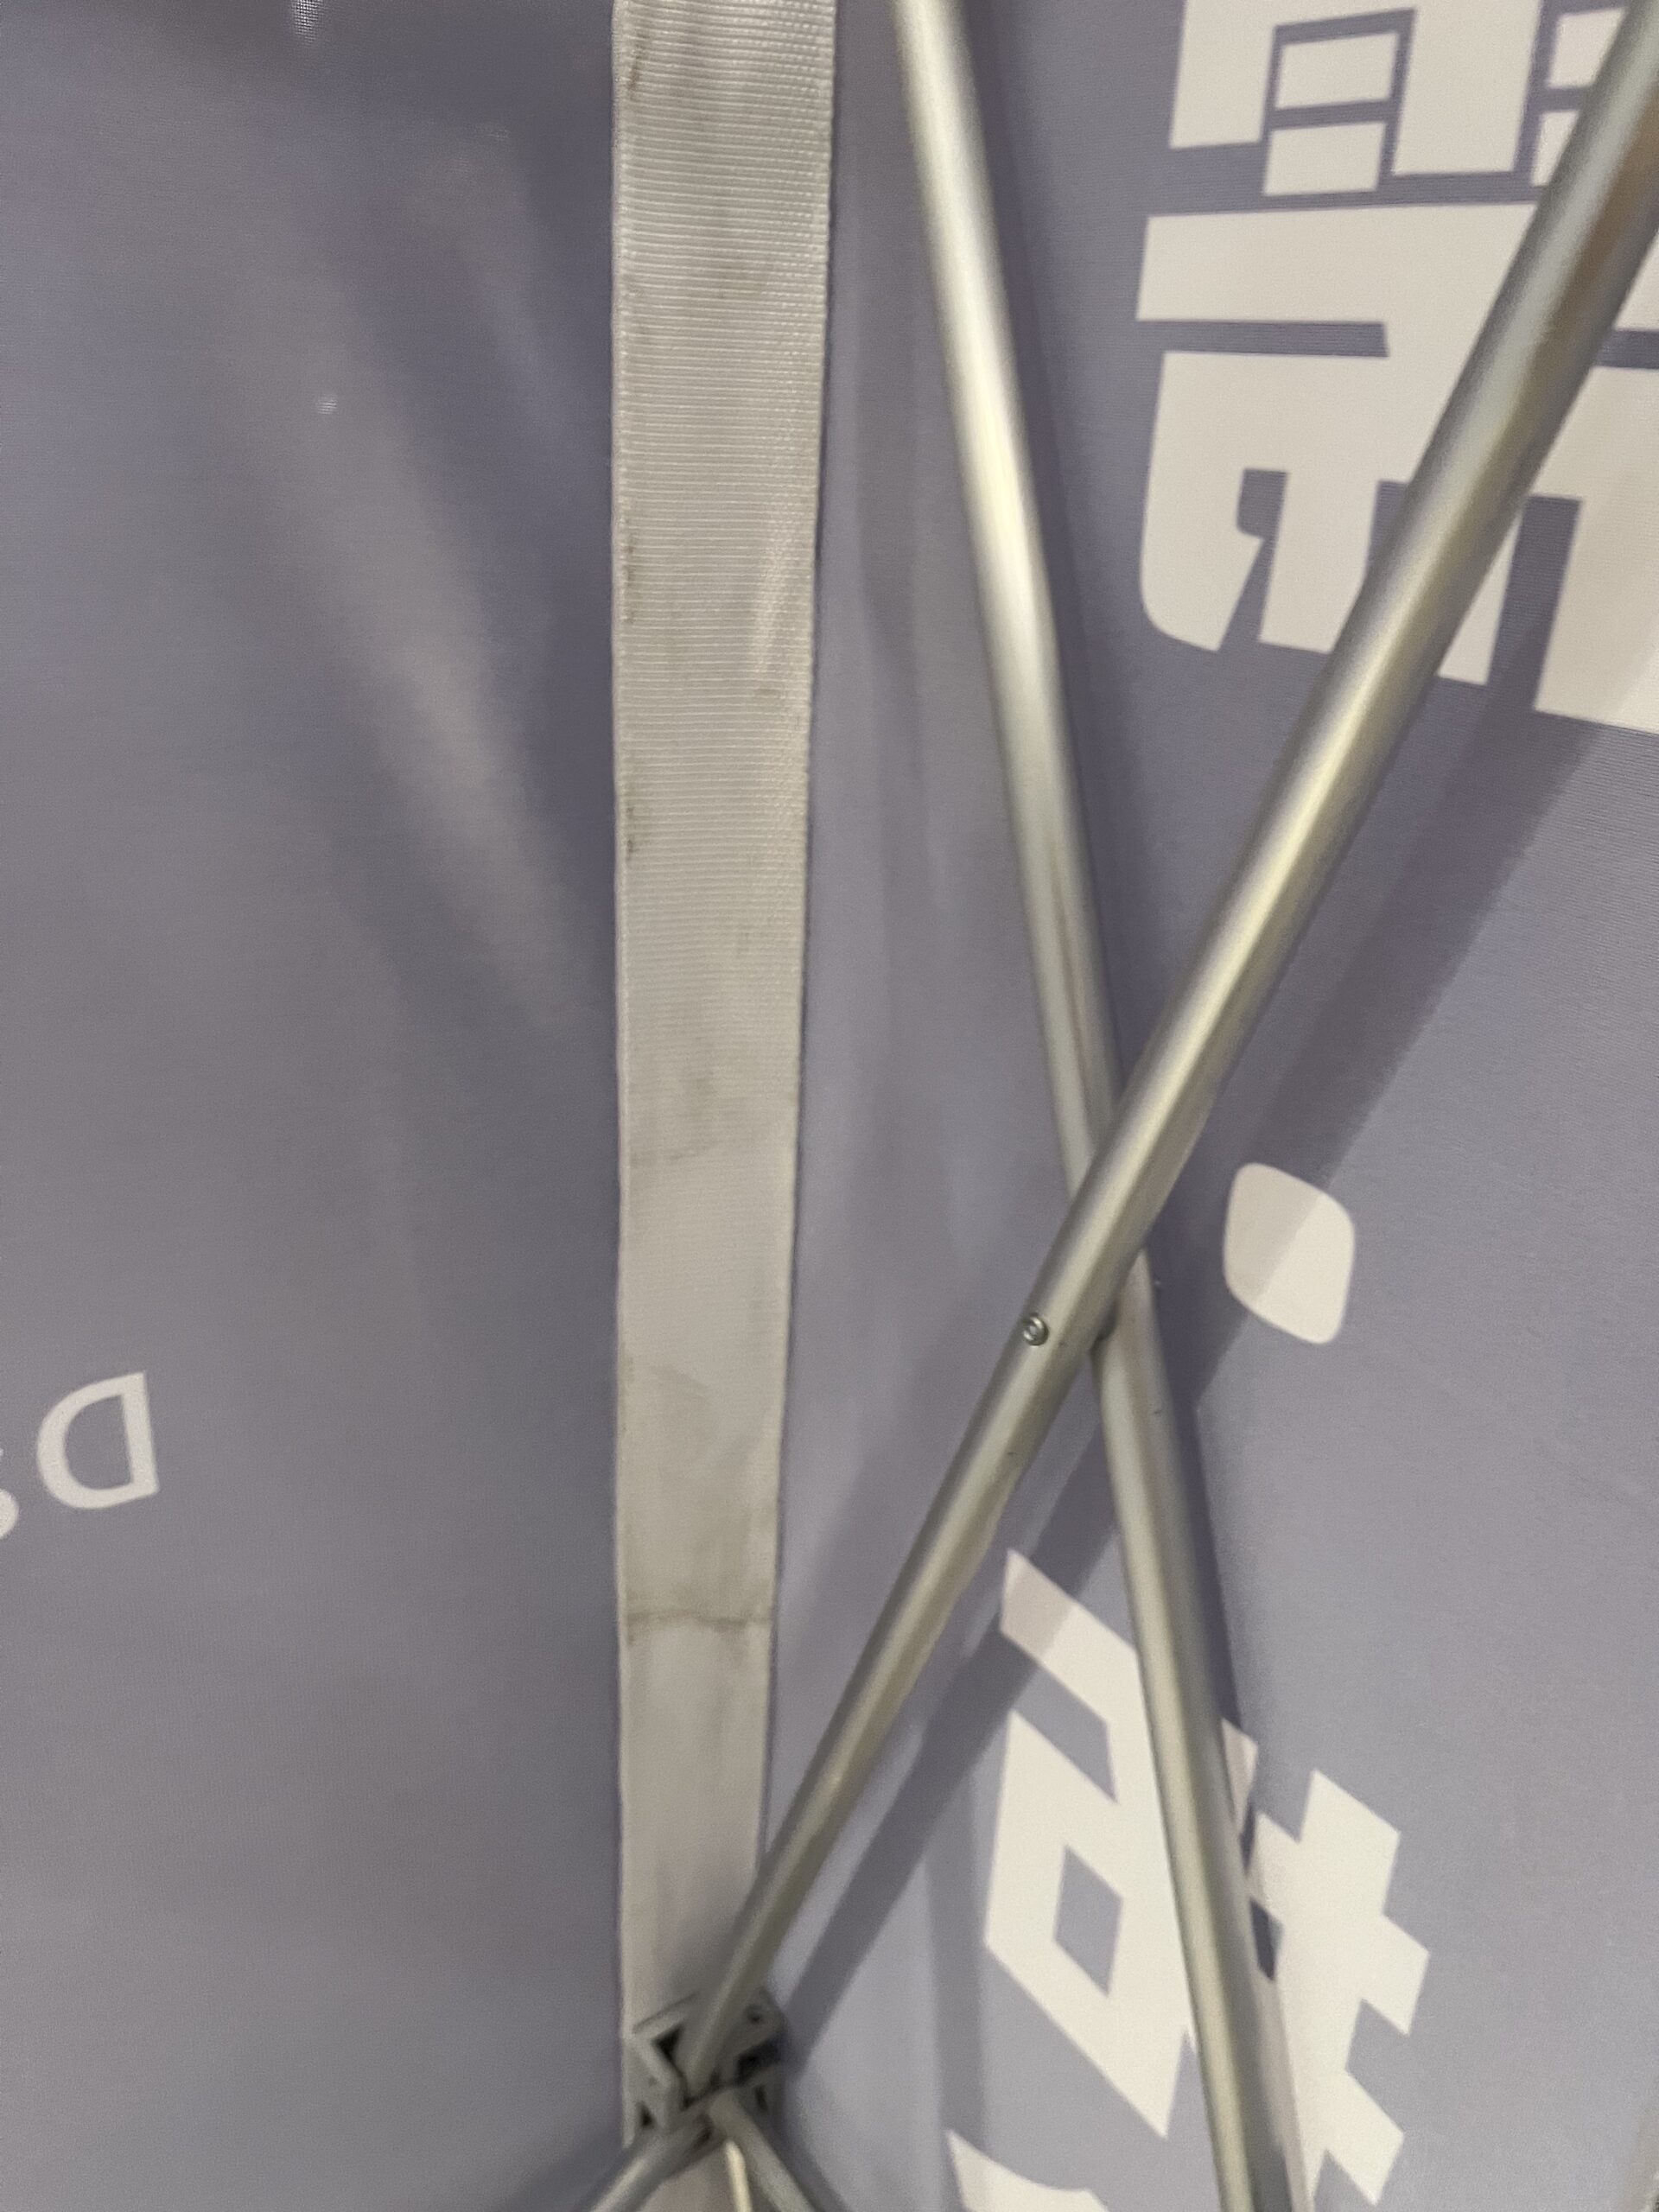
During fitting, align the graphic’s intended edges and corners first, then secure the remaining fastening areas progressively according to the product instructions. Avoid pulling one area excessively to compensate for misalignment elsewhere. If a section does not meet correctly, release and realign it rather than forcing the print.
Keep the fastening surfaces clean and inspect worn or detached strips before reuse. A new graphic needs the correct finished dimensions and fastening positions; print width alone is not enough to establish compatibility.
A practical installation sequence
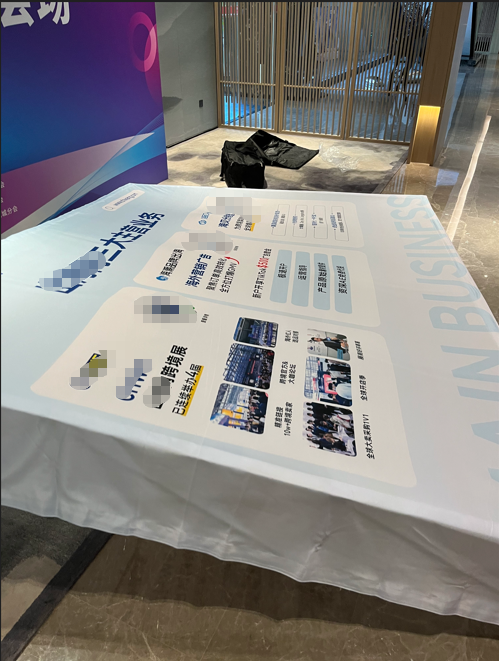
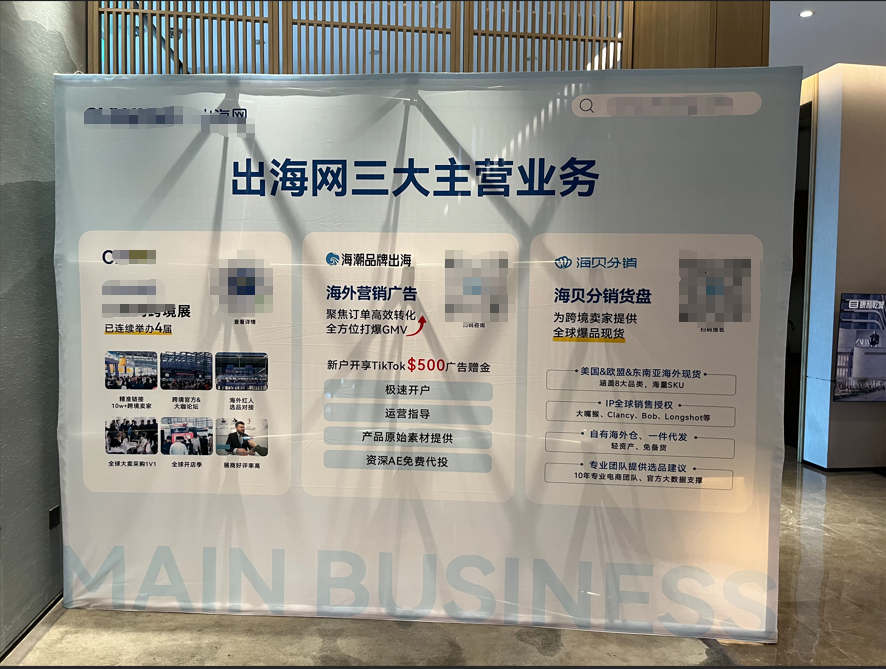
Prepare the components. Identify the frame, graphic, attachment areas and any required supports. The photograph of the laid-out business-services graphic provides a useful view of the print before the finished presentation.
Expand and secure the frame. Follow the instructions for the ordered configuration and check the joints and perimeter before applying the graphic. Do not assume that every pop-up system uses the same locking method.
Align and attach the graphic. Check orientation, corners and side returns, then engage the intended hook-and-loop areas evenly. Review the front surface as the attachment progresses.
Position the completed display. Use the specified support arrangement on a suitable level surface. Account for the full depth of the expanded structure within the event layout and keep the public walking route clear.
Inspect from both sides. The rear photograph shows how the framework supports the graphic and how the print wraps at the side. Check that the attachment remains secure before opening the area to visitors.
This sequence explains the visible preparation and fitting tasks. The photographs do not document an installation time or establish a staffing requirement.
Why omit the light strips for this application?
The choice followed the requested presentation effect: internal lighting was not needed. In this non-backlit configuration, the backdrop itself does not require a lighting power connection. Nearby screens or other event equipment may still need electricity.
This is a configuration decision, not a recommendation to remove electrical parts from an arbitrary lightbox. For a similar project, ask the supplier to specify the appropriate frame, graphic and attachment system for non-illuminated use.
Review the print under the actual venue lighting. The light-colored business-services panel shows visible frame shadows and creases in the supplied photograph. If an opaque appearance is important, discuss a suitable opaque graphic or compatible backing with the supplier and test it before the event. Do not assume that a print intended for illumination will provide the same appearance without its lights.
Event applications shown in the photographs
Exhibition promotion and information. The purple graphic carries IEAE Shenzhen International Electronics & Smart Appliances Expo messaging. It illustrates the use of a large display for an event name, categories and promotional information. Figures and dates printed on the graphic are artwork content, not results measured by this case.
Business-service presentations. The pale graphic organizes three business areas across a wide surface. This format can support conversations in a foyer, meeting area or event presentation zone, with detailed explanations grouped for closer viewing.
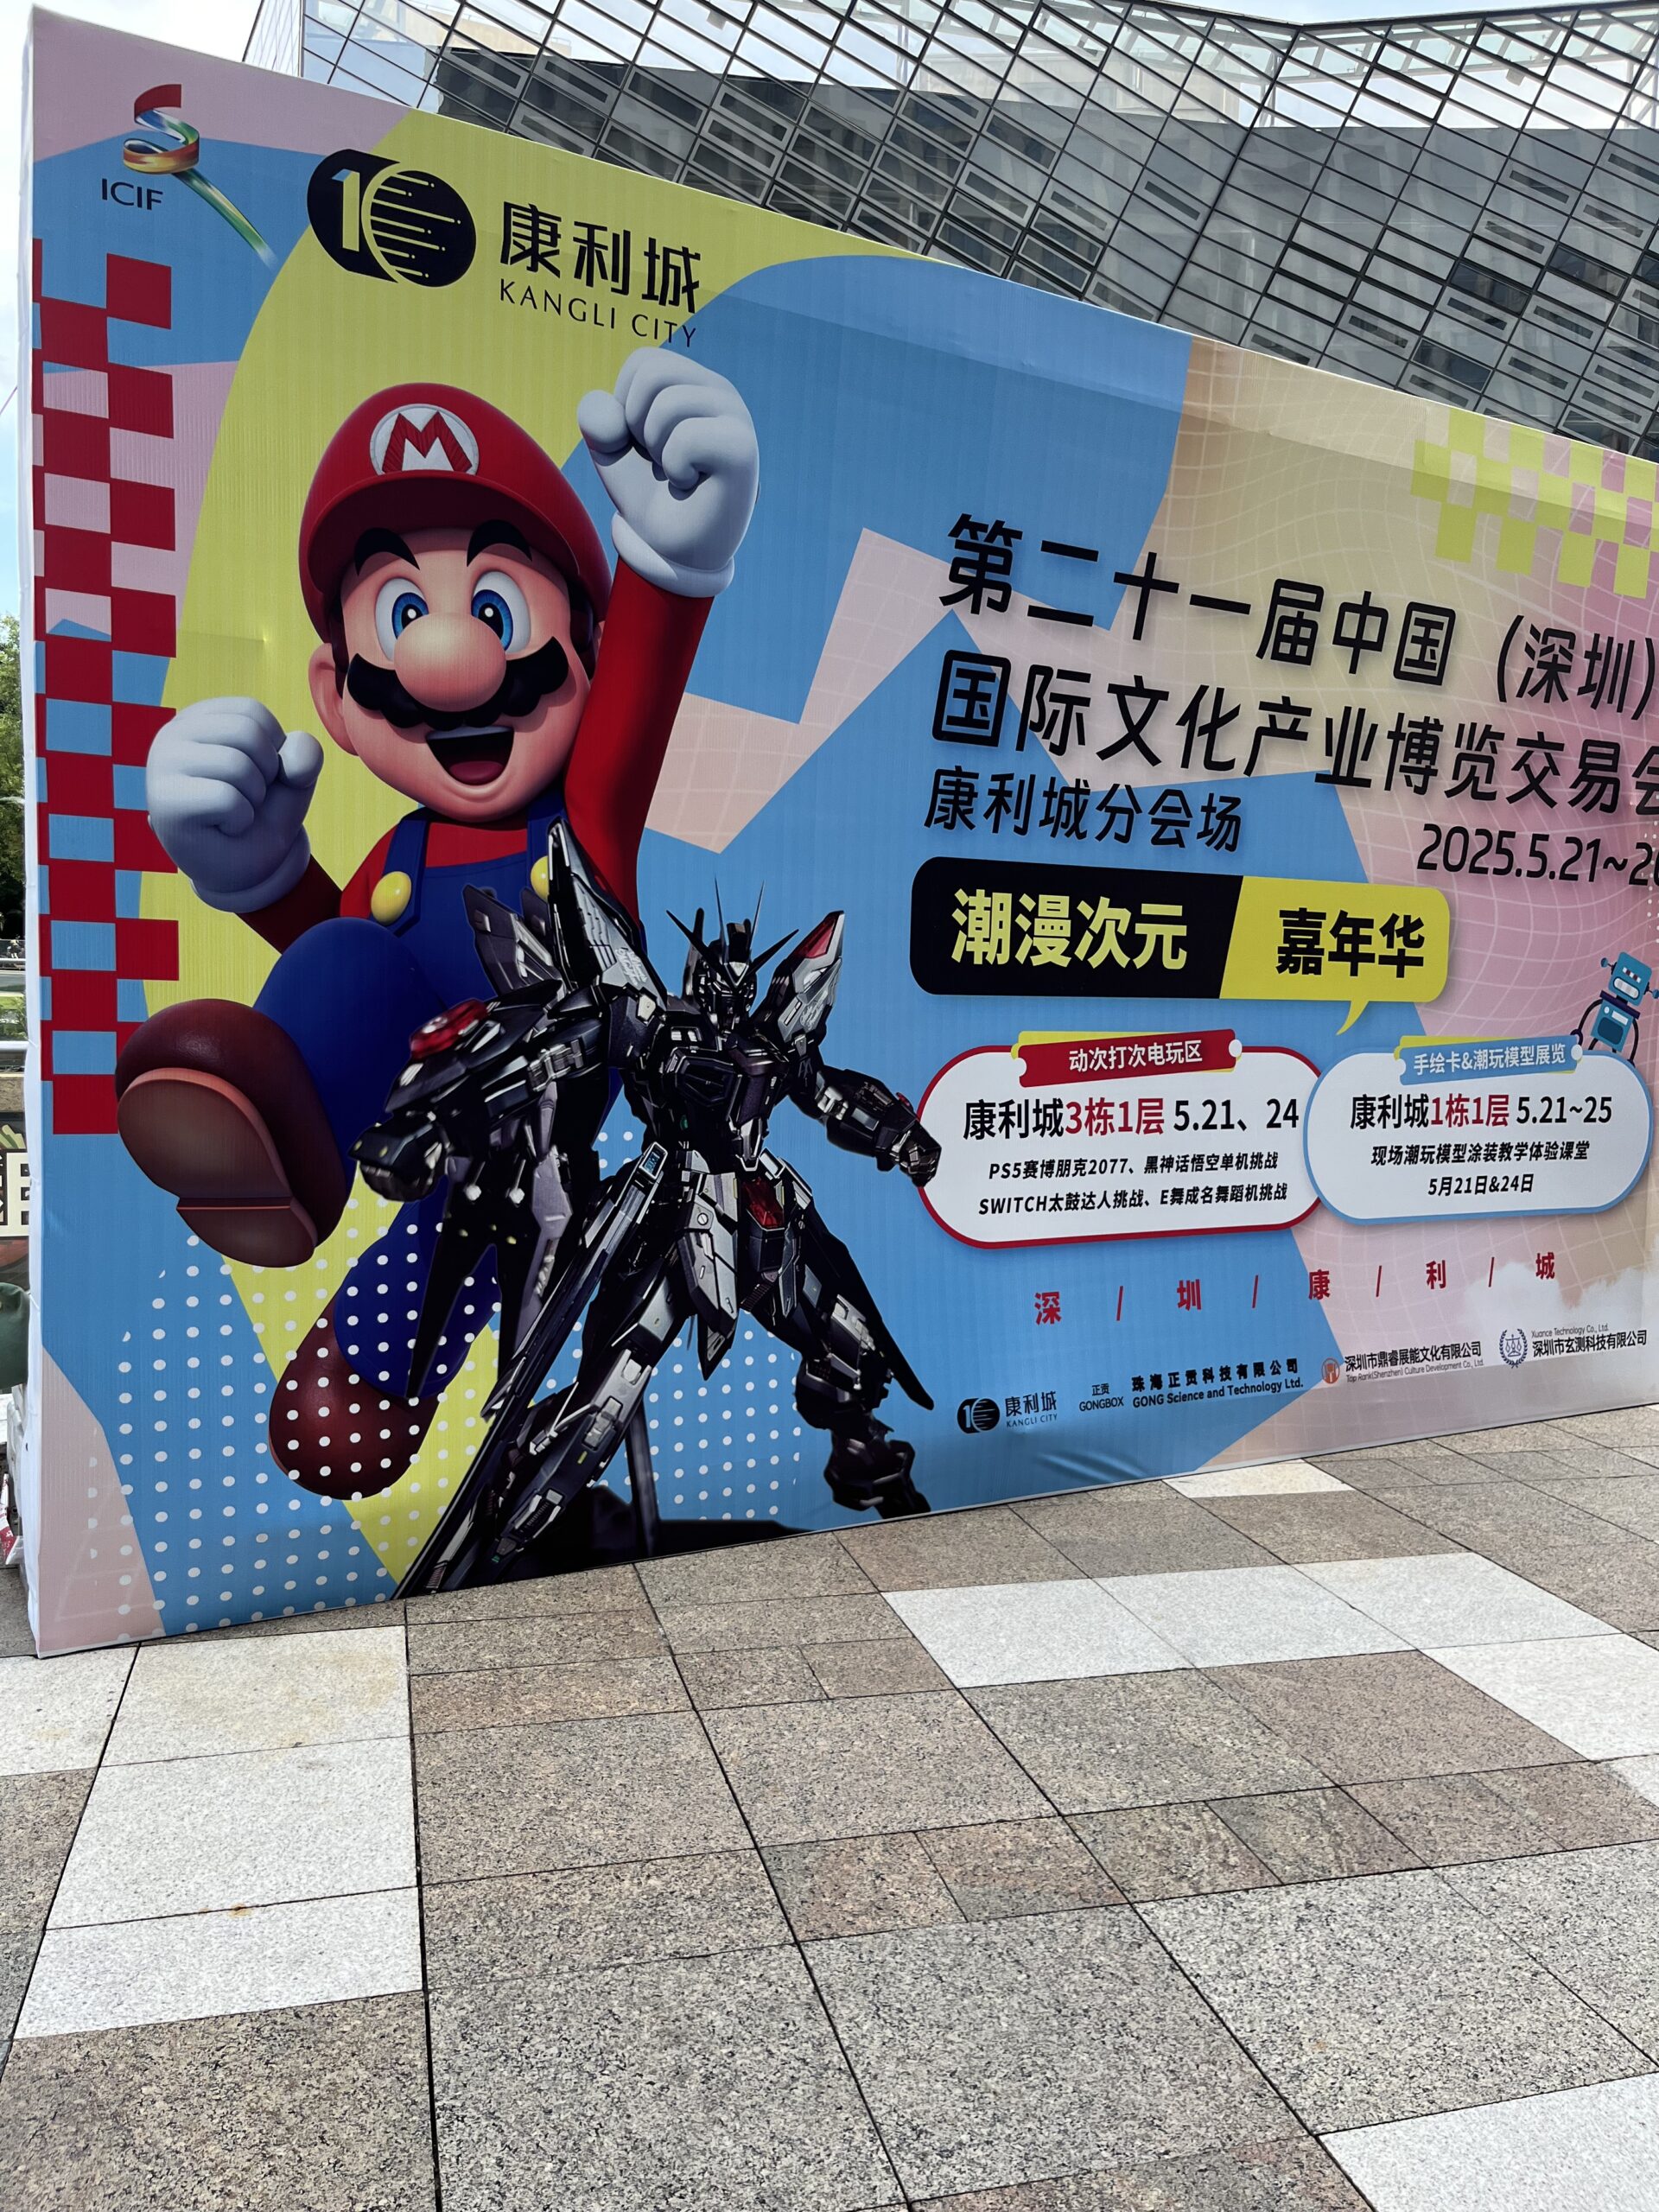
Cultural-event identity. Another photograph shows ICIF and Kangli City event artwork in a bright glazed setting. The photograph provides a finished-use reference; it does not establish outdoor wind suitability or a permanent installation specification.
Dismantling and planning the next use
Release the hook-and-loop attachment progressively while supporting the graphic. Avoid pulling sharply from one corner. Follow the frame instructions for collapsing and packing, and protect the fabric from joints, sharp edges and dirty surfaces.
Keep the graphic clean and dry and use the supplier’s care instructions for storage or cleaning. Before another event, inspect the frame and fastening strips and confirm that the artwork’s dates, contact details and message are still current.
Frequently asked questions
Is this display a working lightbox? No. The configuration described here omits the light strips because the application did not require internal illumination.
How is the graphic secured? It uses hook-and-loop fastening. The correct attachment positions and finished graphic dimensions must match the frame.
Can every illuminated frame be converted this way? Do not assume so. Ask the supplier to confirm a supported non-backlit configuration for the exact system.
Will the frame always be invisible through the graphic? No. Graphic opacity, ambient lighting and placement affect the appearance. Review an appropriate material sample or assembled test if show-through matters.
Buyer takeaway
This case shows a display selected around a practical event requirement: a large printed surface without an internally illuminated effect. The expandable structure supplies the support, and hook-and-loop attachment connects the graphic to its intended fastening areas. The final appearance still depends on accurate fitting, the selected graphic and the surrounding light.
Explore QuicklyShow’s Fabric Display Wall collection for printed presentation options. If illumination is needed for another project, compare the separate Lightbox range.
For a similar non-backlit event display, contact QuicklyShow with the required size, venue setting, artwork and delivery date. You can also upload your graphic files so the frame configuration, print specification and fastening layout can be reviewed together.
