
No products in the cart.
Retractable Roll-Up Banner Stand Case: Structure, Graphic Installation and Event Applications
Quick answer: A retractable roll-up banner stand combines a winding base, a removable support pole and a top graphic rail. The printed panel pulls out for display and retracts into the base for storage. This product-detail case explains the visible structure, separates initial graphic fitting from everyday setup, and shows how the format can support trade shows and indoor promotional spaces.
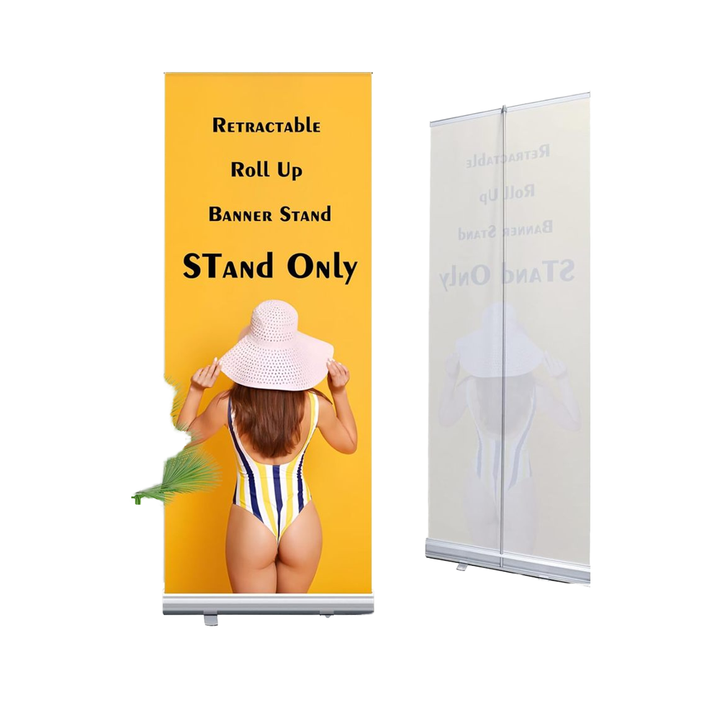
What the supplied product images show
The front-and-rear illustration shows a narrow freestanding display with a silver-colored base, projecting feet, a central rear support pole and an upper rail. The material and connection close-ups reveal the areas buyers should inspect before selecting a stand.
The retail and office images are application illustrations. They help explain placement options but do not document a named customer installation or measured campaign result.
Material and component details
| Component | Visible detail | What to confirm when ordering |
|---|---|---|
| Base cassette | Enclosed housing for the retracted graphic | Housing material, dimensions and transport protection |
| Support pole | Sectioned rear upright | Material, joint fit and compatibility with the stand height |
| Top rail | Profile holding the graphic’s upper edge | Attachment method and compatible graphic thickness |
| Feet | Two supports that rotate out from the base | Fully deployed footprint and connection condition |
| Printed panel | Flexible graphic pulled from the cassette | Substrate, print specification, visible size and attachment allowance |
Aluminum is a common specification for this product family, but the silver finish alone does not establish the alloy or material of every component. Request the model’s specification rather than assuming the feet, pole, rail and cassette are identical materials.
The graphic material also needs its own confirmation. A roll-up mechanism must be matched to a suitable flexible print; do not assume that any fabric or vinyl sheet will retract correctly. Ask about thickness, edge behavior and compatibility with the supplied attachment system.
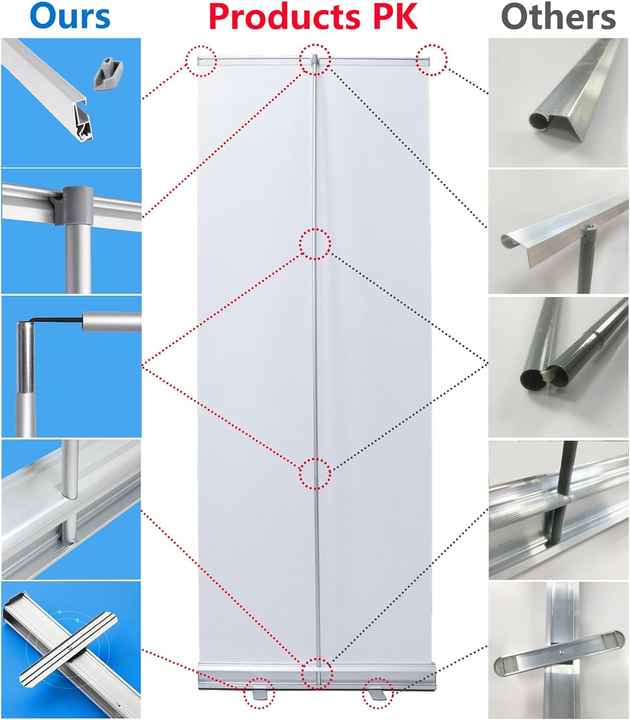
The comparison artwork highlights the rail ends, pole connections, base socket and feet. These are useful inspection points. It does not provide a controlled durability test, so it should not be treated as proof that one stand outperforms all alternatives.
First-time graphic fitting is different from daily setup
The supplied instruction sheet includes operations for attaching the graphic at the top and bottom before releasing the winding mechanism. These are initial fitting tasks, not steps that should necessarily be repeated at every event.
First confirm whether your order includes a fitted printed graphic or hardware only. The main product artwork contains “Stand Only,” so the purchase scope should be agreed explicitly.
For a hardware-only order, obtain the exact artwork template, finished graphic dimensions, top attachment instructions and lower attachment allowance. Follow the model-specific procedure for securing the graphic and controlling the spring-loaded roller. Release the retaining pin only at the stage specified by the supplier, with the graphic correctly attached and held under control. If unfamiliar with this work, request pre-fitting or an assembly demonstration.
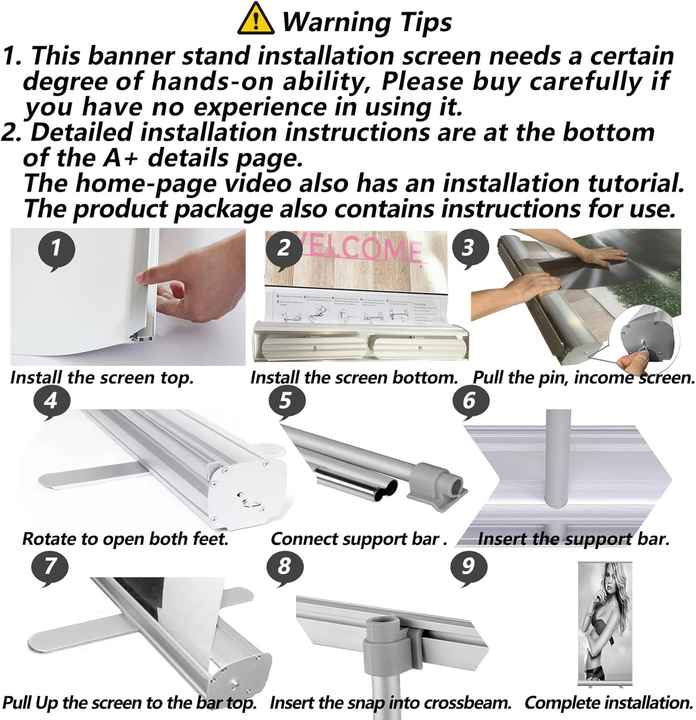
Everyday setup after the graphic has been fitted
1. Position the base and open the feet. Place the cassette on a level indoor surface and rotate both feet into their operating positions. Allow for their full projection within your display area.
2. Assemble the support pole. Join the pole sections according to the supplied instructions and check that each joint is fully seated. Insert the pole into the correct base socket.
3. Raise the graphic under control. Hold the upper rail and pull the panel upward evenly. Keep it aligned with the cassette and avoid pulling beyond the specified extension.
4. Secure the upper rail. Connect the rail to the support pole using the stand’s intended fitting. Check that the connection is seated before releasing your hold.
5. Inspect the finished display. Confirm that the feet are deployed, the pole is seated and the graphic hangs correctly. Position the display where its feet will not obstruct visitors or staff.
For pack-down, support the upper rail while disconnecting it, then guide the graphic slowly back into the base. Do not let it snap back. Remove and pack the pole and return the feet to their storage position as instructed.
Trade show and indoor application scenarios
At a small exhibition booth: use the banner for one clear message beside a demonstration or reception area. Keep the stand, including its feet, inside the booked footprint. A banner can support the booth’s story without replacing a full backdrop or meeting area.
In a retail promotion: place the display near a relevant product group or consultation point. The illustrated paired arrangement could present two offers, but check actual spacing and sightlines before placing multiple stands in a shop.
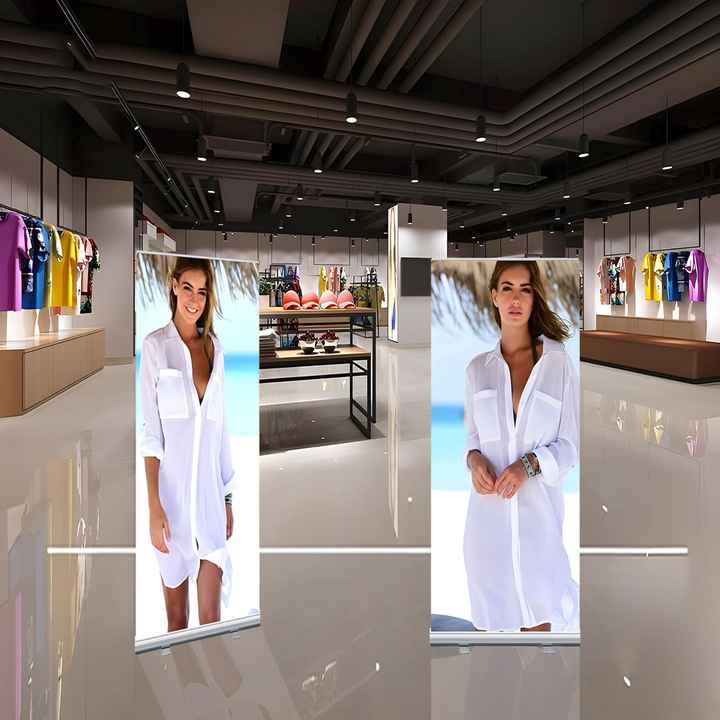
At an office reception or conference: use a roll-up display for a welcome message, agenda or service introduction. Put essential information above furniture height and leave a clear approach to the reception desk.
For a travelling presentation team: confirm packed measurements, weight and protective packing before choosing the transport method. Retractable storage protects the graphic from being carried loose, but it does not establish airline acceptance or eliminate handling damage.
Use this configuration as an indoor display unless the supplier explicitly specifies another use. Outdoor wind suitability cannot be established from these images.
Frequently asked questions
Is the printed banner included? Confirm the quotation. The supplied artwork includes “Stand Only,” which should not be interpreted as a complete printed package.
Do I install a new graphic every time? Normally the fitted graphic remains attached and retracts into the cassette. Initial fitting and replacement require the correct procedure for the model.
How long does setup take? No timed demonstration is provided here. Rehearse the complete setup rather than applying a generic time claim.
Can I replace only the graphic? Ask whether this model supports replacement and whether the supplier should perform it. The new panel must match the rail, roller attachment and dimensional requirements.
Buyer takeaway
A useful roll-up banner is a coordinated system: the cassette controls storage, the pole supports the rail, the feet define its operating footprint and the graphic delivers the message. Checking those details and separating first-time fitting from daily setup helps buyers order a display that matches their actual event needs.
Compare QuicklyShow’s Aluminum Retractable Banner Stand and wider display collection. For a larger background, explore the Fabric Display Wall range.
For the correct configuration, contact QuicklyShow with your intended graphic size, quantity, event date and destination, or upload artwork for review. Confirm the exact model and whether printing, graphic fitting and a carry bag are included.
