
No products in the cart.
SEG Lightbox Booth Case: Combining Illuminated Graphics with Portable Displays
A coordinated exhibition booth brings several display elements together around one clear visual theme. In this example, the SEG lightbox backdrop provides the main presentation surface, while a retractable banner and a portable folding display counter support reception and product communication.
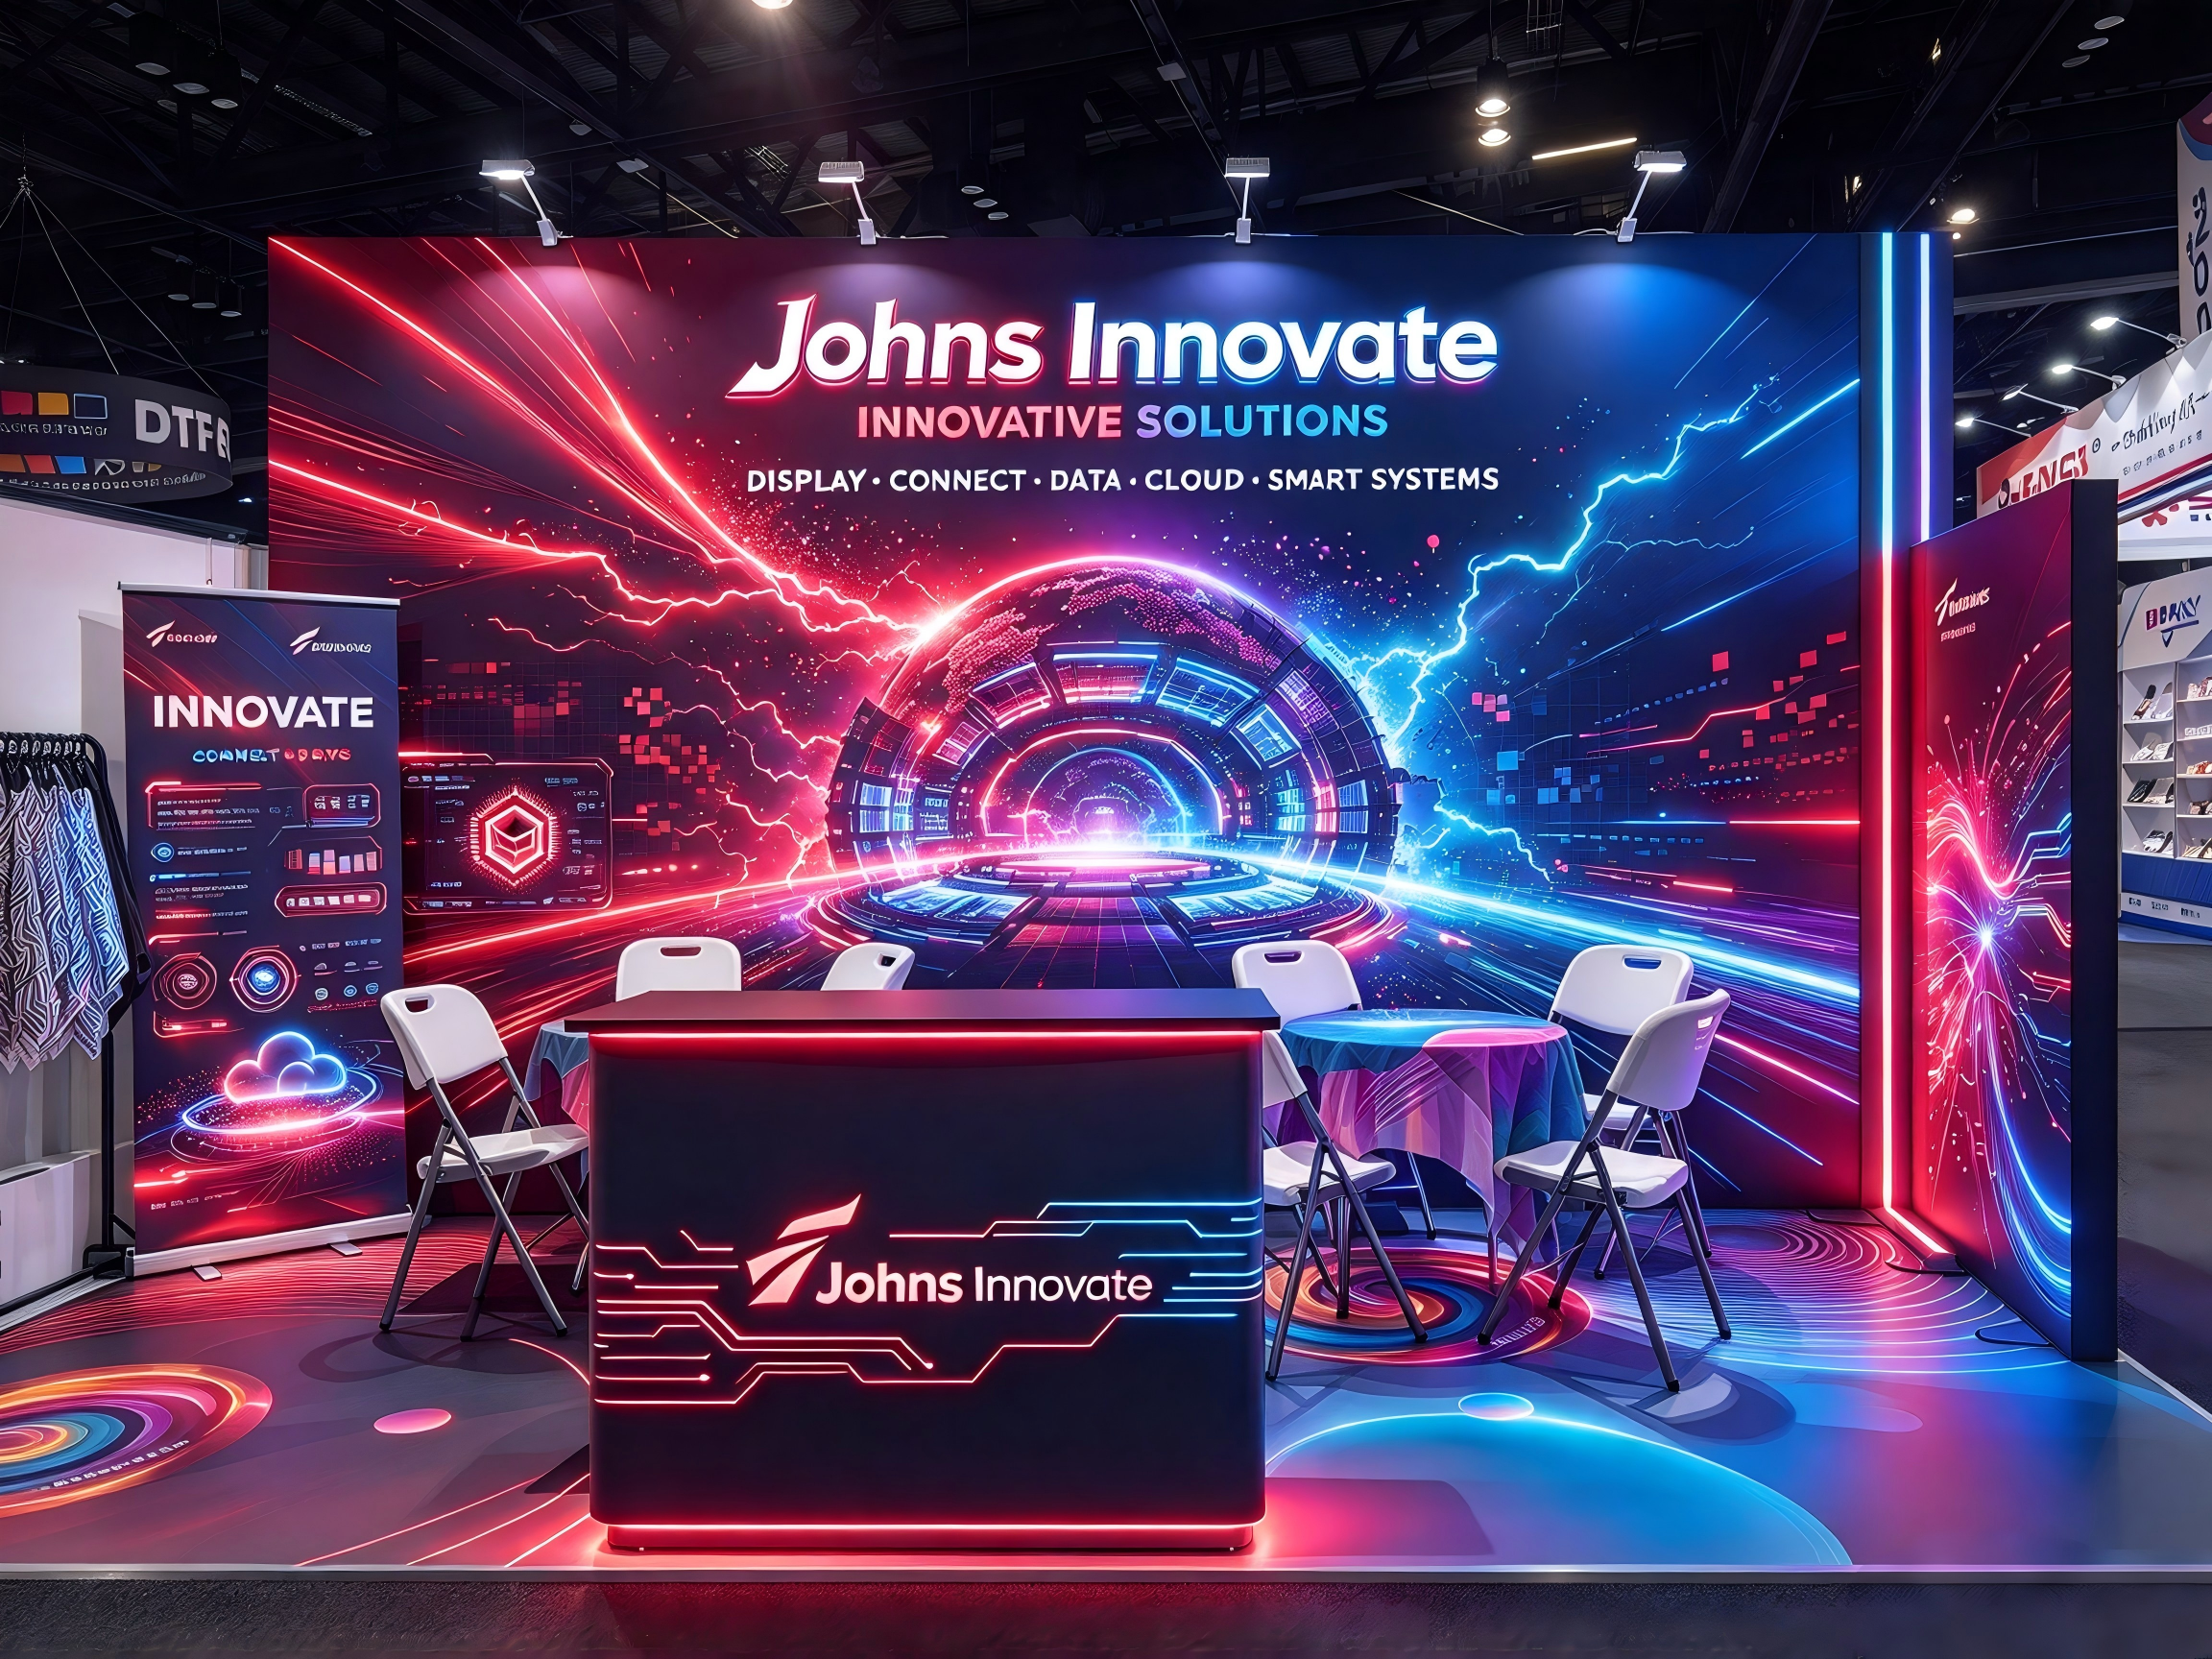
The supplied image uses a red-and-blue technology theme across the backdrop, counter, side display and floor graphics. Together, these elements create a visually connected space for introductions and seated conversations.
A Large Graphic Backdrop Sets the Direction
The main backdrop carries the largest brand message, positioned above the furniture so it remains visible from the aisle. A central circular illustration draws attention toward the middle of the display, while red and blue lines extend across the graphic.
According to the supplied product information, the booth incorporates SEG lightbox elements. SEG graphics use a silicone edge that fits into a compatible frame channel, holding the fabric under tension.
For a similar project, the lighting system, fabric and print specification should be selected together. The bright appearance in an image can also reflect printed effects, external lighting and image processing; it does not establish the brightness or lighting construction of every surface.
Portable Elements Give Each Area a Purpose
Retractable Banner: Supporting Information Near the Entrance
The retractable banner on the left provides an additional vertical surface for supporting messages. It can carry product categories, service information or a focused campaign message without adding that detail to the main backdrop.
Its placement should preserve a clear entrance and avoid covering important information on the larger graphic. Text should be readable at the distance from which visitors are expected to approach.
Folding Display Counter: A Clear Reception Point
The portable folding display counter identified in the supplied information sits at the front of the booth. Its position creates an obvious place to greet visitors, present brochures and begin a conversation.
The counter artwork follows the same red-and-blue theme as the backdrop. This makes it part of the overall presentation while giving staff a practical working surface.
The photograph shows the finished counter appearance. Its folding mechanism, load capacity and packing dimensions should be confirmed from the specific product documentation.
Tables and Chairs: Space for Longer Conversations
Tables and chairs behind the counter provide a place for more detailed discussions.
When planning a similar arrangement, check the layout with chairs pulled out and occupied. Staff and visitors need enough space to move between the reception point and seating area without moving display equipment.
Connect the Artwork Across Different Products
The strongest feature of this composition is its consistent visual language. The backdrop establishes the theme, and the smaller displays repeat selected colors and graphic details.
For production, each component still needs its own correctly sized artwork file. A backdrop, retractable banner and counter have different proportions, viewing distances and areas that may be hidden by hardware.
A useful approach is to assign one main message to each surface:
- Backdrop: brand identity and the central campaign message.
- Retractable banner: supporting product or service information.
- Counter: a short brand statement visible during conversations.
- Side display: a message for visitors approaching from another angle.
Keep essential text away from graphic edges, panel joins and areas covered by furniture.
Installation Planning for a Similar Configuration
Start by confirming the booth footprint, permitted display height and electrical requirements. Mark the positions of the main display, counter and seating before assembly.
Assemble the SEG frames using the instructions for the selected system. Complete the required supports and connections, then install and test compatible lighting components before fitting graphics that restrict access.
Fit the SEG fabric using the manufacturer’s recommended sequence, distributing tension evenly around the frame. Check artwork orientation and edge seating before applying additional force.
Next, position the retractable banner and assemble the folding counter according to their separate instructions. Extend a retractable graphic under control and check that its support pole and base are correctly engaged.
Finish with a complete inspection of graphic alignment, lighting, cable routes and furniture clearance. These are planning steps for a comparable booth; the supplied image does not document the original assembly sequence.
Prepare the Display for Future Events
Portable display elements can support changing campaign needs. A retractable banner can present a different message, while a compatible SEG graphic can be replaced to suit another event.
Before ordering replacement graphics, confirm the exact hardware model and production template. Reusing equipment also requires checking frame connections, graphic condition, counter hardware and electrical components between events.
Plan Your Display Combination
Begin with the space available and the conversations your team wants to have. A coordinated backdrop, banner and counter can support a clear visitor journey from first impression to reception and discussion.
Explore QuicklyShow’s Lightbox range, see a related foldable display counter assembly case, or contact the team to discuss a suitable combination.
