
No products in the cart.
Pop-Up Lightbox Display Case at CES: Illuminated Keyboard Graphics and an Open Booth Layout
A large illuminated graphic can introduce a product before a visitor steps into the booth. In this CES application, a pop-up lightbox display combines blue product graphics with a layout that accommodates reception, product presentation and seated conversations.
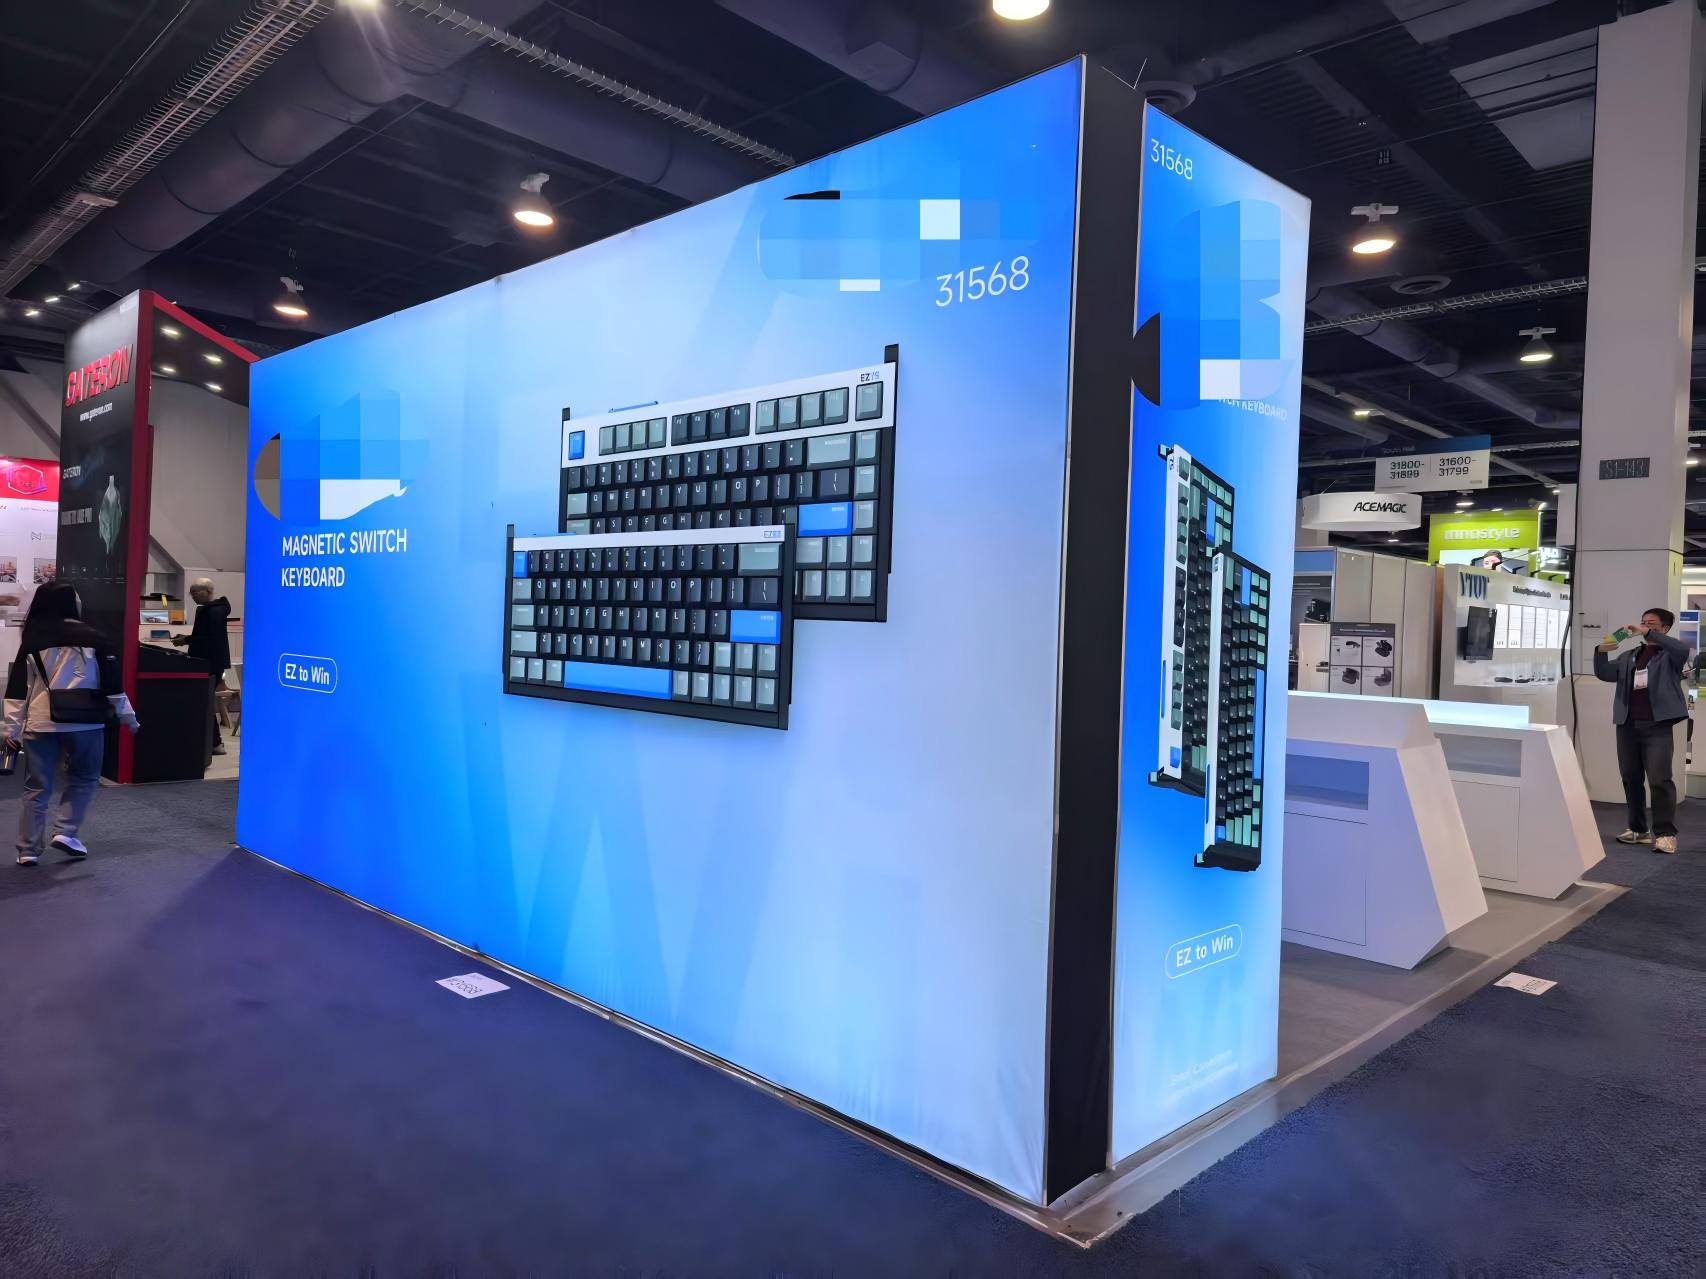
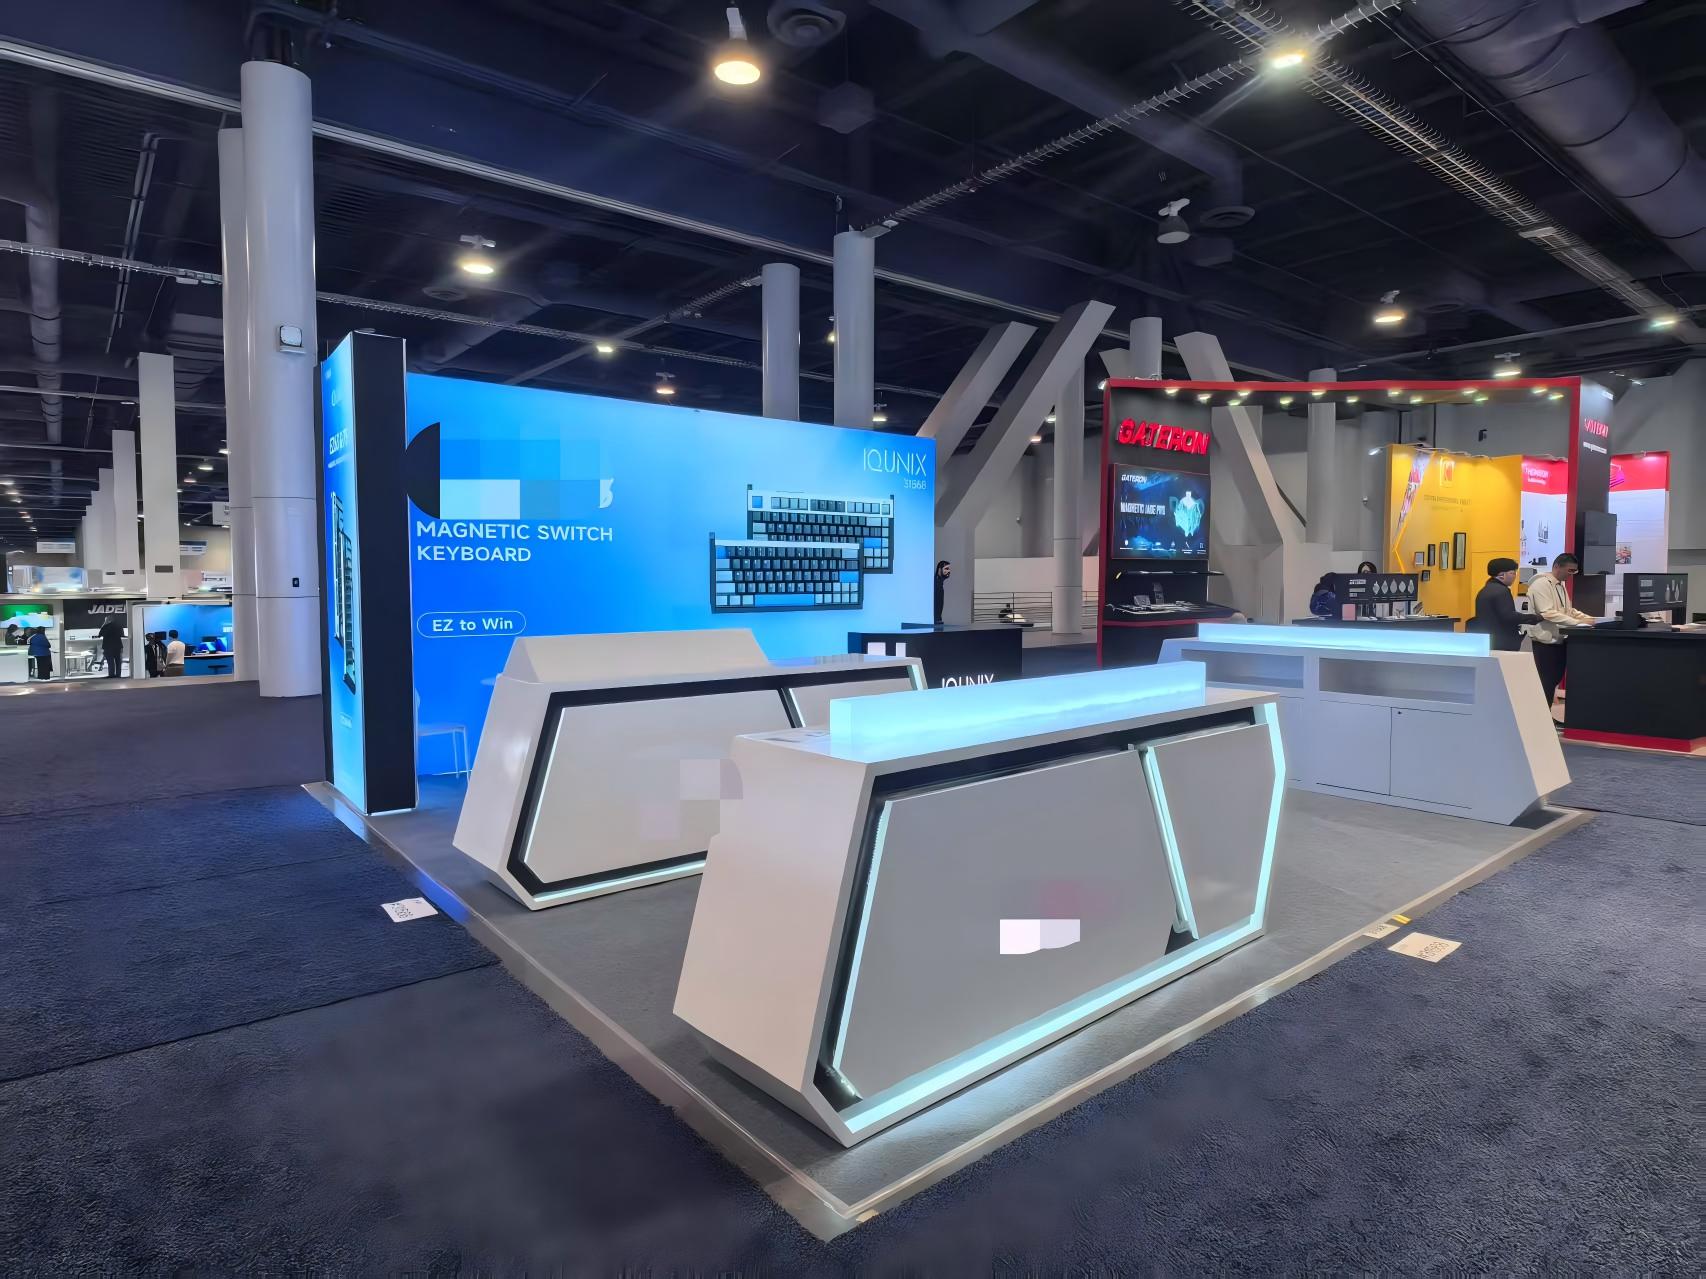
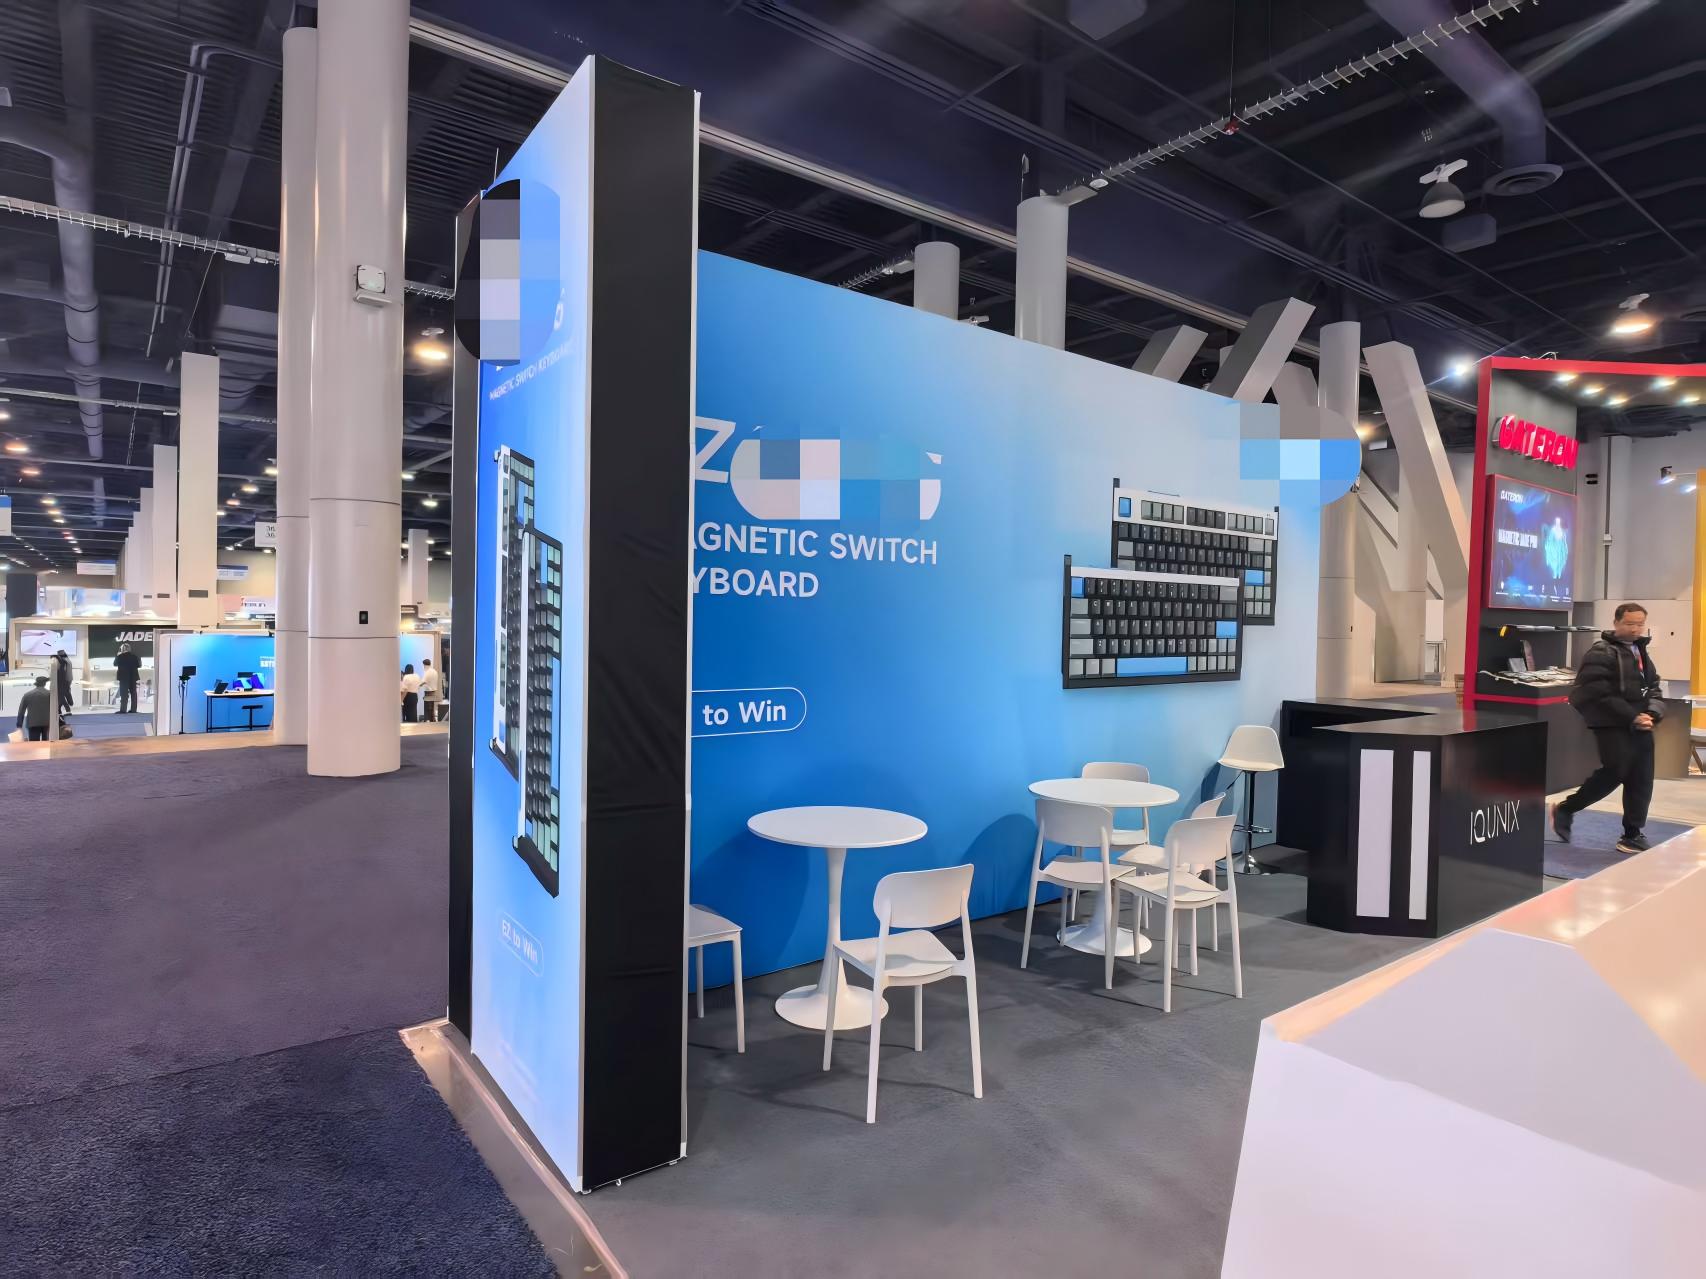
The photographs, supplied and identified by QuicklyShow as an installation at CES in the United States, show the finished booth from several directions. A broad illuminated wall presents magnetic switch keyboards, while a narrow perpendicular display extends the message toward another aisle approach.
The Main Display: Give the Product a Clear Visual Role
The main graphic uses a blue gradient background, large keyboard imagery and a short product description. This gives visitors a straightforward introduction to the product category without requiring them to read a dense specification sheet.
The keyboard images occupy a substantial portion of the graphic. Supporting text remains separate, allowing the product and message to be understood together.
For a similar display, the artwork should establish a clear order:
- A recognizable brand or product name.
- A short description of the product category.
- A prominent product image.
- Supporting information for visitors who move closer.
A Perpendicular Display Supports Another Approach
The narrow vertical display repeats the keyboard imagery and blue color scheme. Its orientation gives visitors approaching from the side another opportunity to identify the booth’s product focus.
This is a useful planning principle for a booth visible from more than one direction. Each important approach should have a readable message, with artwork adapted to the proportions of that display face.
The dark vertical surfaces between the graphic faces also create a visible boundary. When preparing a similar arrangement, check the complete corner treatment, including panel edges, connections and any exposed rear surfaces.
Separate Product Presentation from Seated Discussion
The wider booth views show several white presentation counters toward the open area, with round tables and chairs positioned beside the illuminated wall. A dark reception counter provides another point for staff interaction.
These elements give different activities their own space. Presentation counters can support closer product conversations, while the tables provide a place for longer discussions.
The photographs document the arrangement; they do not establish the construction or portability of the counters. Those details should be confirmed separately when specifying a comparable booth.
Use Illumination to Support the Artwork
The blue graphic surfaces create a consistent visual background for the keyboard presentation. White furniture and dark counter finishes provide contrast within the space.
For a pop-up lightbox, the finished appearance depends on the combination of lighting, printed fabric and display structure. Artwork should be checked under illumination so that product details remain clear and important text retains sufficient contrast.
Large pale areas deserve particular attention during inspection because they can make variations in illumination or fabric tension easier to notice. Photographs taken from different angles and with different camera exposure settings should not be treated as measured brightness comparisons.
Assembly Planning for a Similar Pop-Up Lightbox
The supplied photographs show the completed installation rather than the assembly process. For a comparable project, the following checks help organize installation.
Confirm the components and layout
Check the frame, compatible lighting components, graphics, supports and electrical connections against the product instructions. Mark the display and furniture positions before assembly.
Expand and secure the frame
Open the pop-up structure using the specified procedure and engage the required frame locks or connectors. Complete the supports and any approved connections between display sections before fitting graphics.
Install and test the lighting
Fit the lighting components and power supplies specified for the system. Check connections and route cables away from visitor circulation areas.
Test the lighting before installing any graphic that restricts access to internal components.
Fit the graphics using the correct attachment method
Use the attachment method supplied for the selected model. The finished photographs do not establish whether this particular graphic uses hook-and-loop fastening, silicone edging or another connection system.
Check orientation, edge alignment and tension, then inspect the illuminated surface from several viewing positions.
Complete the furniture and access check
Position the counters, tables and chairs, allowing space for visitors to enter and for seated guests to move comfortably. Check electrical access, cable routes and display stability before opening the booth.
Preparing for Another Event
When planning to reuse a display system, inspect the frame connections, lighting components and graphics after dismantling. Pack the printed fabric separately from components that could mark or damage it.
Replacement artwork should follow the exact template for the existing hardware. If the arrangement changes for another booth space, review the supports, electrical routing and furniture layout again.
Plan Your Illuminated Product Display
This CES application illustrates how a large product graphic, a perpendicular display face and a practical furniture arrangement can work together within one booth.
To discuss a similar project, share your booth dimensions, open sides, product presentation needs and artwork requirements. Explore QuicklyShow’s Lightbox range or contact the team to review a suitable configuration.
